Posts Tagged ‘branding’

How to: Claim Your Username and Vanity URLs

laelene Posted in how to guides,Tags: , , , , , , , , , , , ,
7
Ever want to claim “facebook.com/yourbrand” only to find it was taken? Rather than accepting that and settling for something like “facebook.com/yourbrand123″ (which is less than optimal), read on to learn how you might be able to get what is rightfully* yours.

First let me start by saying that most sites already use vanity URLs, so whichever username you choose will usually end up being in your URL. For example:

http://twitter.com/maryqin
http://pinterest.com/maryqin
http://instagram.com/laelene

For these sites, the issue of the getting the vanity URL you want ends up being the same as getting the username you want. Once you get the username, you get the associated URL.

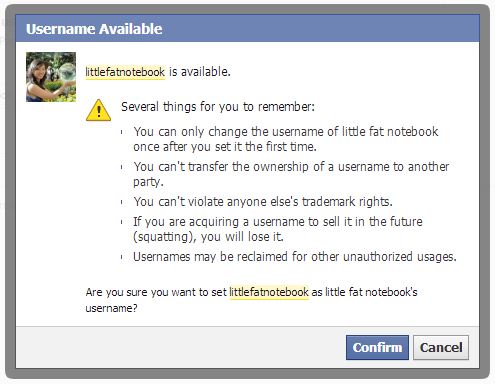
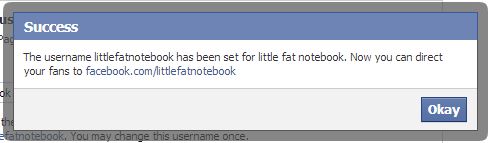
Now Facebook is an exception to this and you actually have to set the vanity URL yourself. They start you off with some ugly URL like http://www.facebook.com/pages/little-fat-notebook/457453117668145. Just go to the username settings page to change it to something pretty like http://www.facebook.com/littlefatnotebook. You can do this for your personal profile as well as any Facebook pages you manage. The cool thing is that usually you have to wait until you have 25 fans on a page before you can set the username, but by doing it this way you bypass that requirement! [Edit: Looks like there still might be a minimum – I was able to set the username with just 16 fans but I can’t for another page that only has 4 fans right now.]

facebook page set username

facebook page set username confirmation

Ok, so let’s say you’re claiming these usernames for your brand and you find someone has already taken them. You may not have to resort to choosing a different username – there’s an option to try to claim the username by reporting trademark infringement. A few tips for improving your chances of filing a successful claim:

1. You should own the domain name related to the username you want. For example, I own pandaloves.com and I wanted facebook.com/pandaloves and twitter.com/pandaloves

2. Even better if you actually own the trademark for the name in question, but it’s not necessary. If you do own it, make sure you can prove it to help your case. I never registered a trademark for my brand’s name, Panda Loves, but that was fine.

3. If you do own the domain (i.e., pandaloves.com), use an email set up from that domain for more credibility. This shows that you are an authorized representative of the business. I used contact@pandaloves.com as my contact email when I filled out the form.

I came across this helpful article for claiming usernames on Facebook and Twitter, which you should read if you are claiming a username on either site. I was able to successfully claim both usernames on Facebook and Twitter, but not Pinterest (they never got back to me). I haven’t tried for other sites.

For Facebook, go here to fill out the form: https://www.facebook.com/help/contact/208282075858952

For Twitter, there are two routes you can take depending on if you own the trademark:

https://support.twitter.com/forms/impersonation (if you don’t own the trademark)
https://support.twitter.com/forms/trademark (if you do own the trademark and have proof)

And for other sites, I located articles that can help with the claim process. For any site not listed, do a search in their help section for terms like “trademark infringement” or even “impersonation” to locate more information.

Pinteresthttp://about.pinterest.com/trademark/
YouTube: http://support.google.com/youtube/bin/answer.py?hl=en&answer=151655
Etsyhttp://www.etsy.com/help/article/17
Instagramhttp://help.instagram.com/customer/portal/articles/118970-trademark-policy-for-instagram-usernames

Let me know if you have any further questions or how it goes when you do file your claim on these sites! Good luck!


*This is, of course, assuming that it is your right: that you are trying to claim the name of a brand you own and not take someone else’s.

How to: Make and Use A Favicon

laelene Posted in how to guides,Tags: , , , , , ,
2

[You can skip to the step-by-step if you’re in a hurry.]

One of my mini-obsessions when it comes building and maintaining your own website (including a blog, e-commerce store, or what have you) is having a personalized favicon. If you don’t know what a favicon is, it’s that little square image that you see on the tabs of your browser, as shown below.

line of open tabs showing various favicons in browser

The first three are my sites, which you can see each have their unique image. While they may not be the best, at least it separates me from the crowd and I don’t get the ugly paper shown on the far right. That’s what many browsers use as a placeholder for sites with no favicon. Some look better, some look worse, but you get the idea – it says nothing about YOUR site.

I tend to have a ton of tabs open at a time, so that the only thing I can see about a tab is the favicon. This becomes an important way for me to identify which tab I want to go to. I can easily spot, say Facebook, and open up that tab without guessing which one is the right one. It’s a simple step for branding that many smaller sites don’t take advantage of.

So here’s what you do:

1. Choose an image (or images) you want to use. You might want to test a few images to see which you like best. The image has to be cropped to a square and it can be your logo, your profile pic, or whatever you feel best represents your brand/website at a glance. Bloggers, it’s probably best for this to also be your avatar image when you post comments on other sites. The consistency in visual branding can only help.

2. Use a tool like HTML -Kit’s FavIcon Generator. You can upload the picture from your computer or even pull from your Twitter account’s profile pic. Then click Generate FavIcon.ico and be patient! It may take up to a minute to upload your picture and process it. If you do not upload a square image, the tool will automatically crop your picture.

non-square image gets cropped into square to generate favicon on htmlkit.com

My picture got cropped to a square and my feet were cut off in this example.

3. Download your favicon package if you’re satisfied. If not, you can upload another image until you find one you like. The HTML -Kit FavIcon Generator shows you the still and animated versions of your favicon in a browser image. You can actually click on those images to get a live preview in your own browser.

4. Open the .zip file and unzip or extract the files. You can choose to use the still or animated file. The animated  file is a .gif and the still file is a .ico. There’s also a ReadMe.txt included, with instructions on how to install your new favicon of choice. You can read that or continue with this post!

5. Now log in to your web provider (I use JustHost, many of you probably use GoDaddy, HostGator, BlueHost, etc.) and open up the File Manager. You want to go to the Root Directory of your site. If you have multiple sites, make sure you to go the correct one!

6. Upload your favicon to the Root Directory. Choose whichever one tickles your fancy, but I’d recommend the static .ico one since animated ones can appear unprofessional.

7. Add the following code to the header section of your HTML code (in between the <head> and </head> tags):

<link rel=”shortcut icon” href=”favicon.ico” >

For the animated favicon, you’re going to add some extra code:

<link rel=”shortcut icon” href=”favicon.ico” >
<link rel=”icon” type=”image/gif” href=”animated_favicon1.gif” >

8. That’s it! Refresh your page (sometimes you need a “hard” refresh by pressing Ctrl+F5 or sometimes you need to clear your cookies, maybe even close your browser or try a different one) and voila, your favicon has been updated and now represents you. 🙂

Related Posts Plugin for WordPress, Blogger...