[Editor’s Note: This is an updated version of the original blog post that is now nearly three years old! This includes up-to-date instructions after some changes to Facebook’s interface.]
I decided it was time for me to create a Facebook page for my little blog, so I can really try to build it out and maybe get some followers! I’d like to think that what I’m putting out there is educating or entertaining someone, but I’ve never really promoted it so it’s time to take action.
When I went to create the FB page, I (for the life of me) could NOT find where to choose the “Personal Blog” category! And that’s what spurred this entry. Read on to learn the basics for setting up a Facebook page and how to select a category like “Personal Blog,” “Personal Website,” and more!
Creating Your Facebook Page
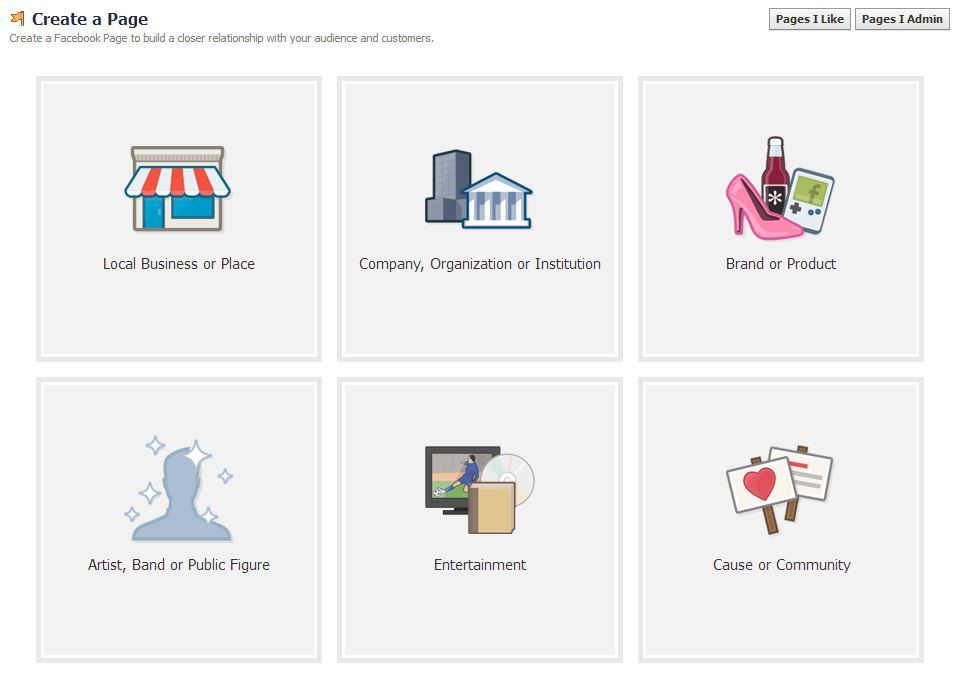 First of all, here’s where you can create a new Facebook page. As you’ll see, right away they want you to choose a category. Your desired page may fit multiple categories, so it’s up to you to decide which one is best for your needs. Of the 6 types they’ve laid out for you (1. Local Business or Place; 2. Company, Organization or Institution; 3. Brand or Product; 4. Artist, Band or Public Figure; 5. Entertainment; 6. Cause or Community), all but the last one have a dropdown menu with category choices. Don’t worry if your desired category isn’t there – just pick what’s closest or tickles your fancy. In my case, I went for “Brand or Product”and chose “Website” from the dropdown.
You will be asked to enter your page name, which should be the title of your blog, the name of your business, or whatever you want the world to know your page by. Note that Facebook has certain rules in place about what is allowed in a name – for example, I tried to enter my blog name, ((little fat notebook)), but it was immediately rejected because I’m not allowed to use symbols. You are allowed one set of parentheses, but there can only be two words in it (like this) and obviously I’d have three if I went for (little fat notebook). Alas, I then tried just plain “little fat notebook” and that’s not allowed because the name must start with an uppercase! I didn’t like how Little fat notebook looked, so I went for the boring old Little Fat Notebook. Luckily, you can change it after the fact!
Setting Up Your Facebook Page
Once you agree to their terms and click Get Started, you’re prompted to fill in a description and add links to your site(s). They now allow you to choose your vanity URL (the pretty one that looks like https://www.facebook.com/littlefatnotebook instead of https://www.facebook.com/pages/little-fat-notebook/457453117668145). Check out my post on claiming vanity URLs to learn more. Choose carefully, you can only ever change it once after that. Next upload an avatar/profile picture to represent your page.
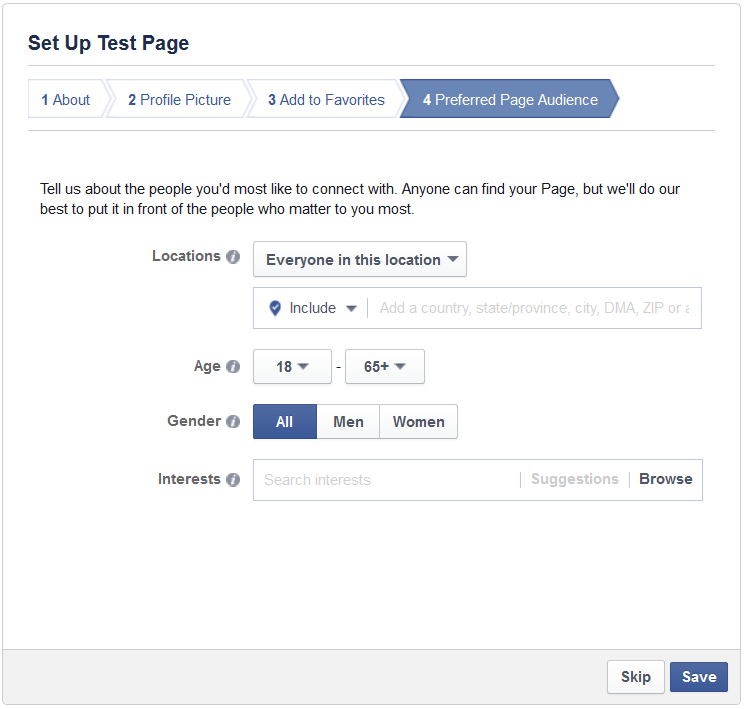
You can then add this new page to your Favorites area for quick access. That’s the part on the left when you go to Facebook.com. Finally, you can indicate your target audience including where they’re located, what age range they’re in, their gender, and their indicated interests. You’ll then be taken to your brand new Facebook page! A quick tour is given and then you’re given free reign. Feel free to add a cover photo, invite friends to like your page, and share your very first post!
Changing To A Better Category
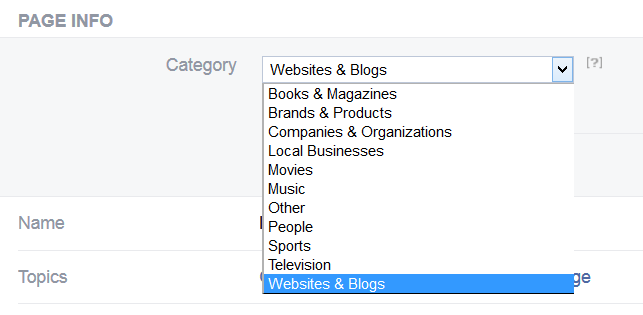
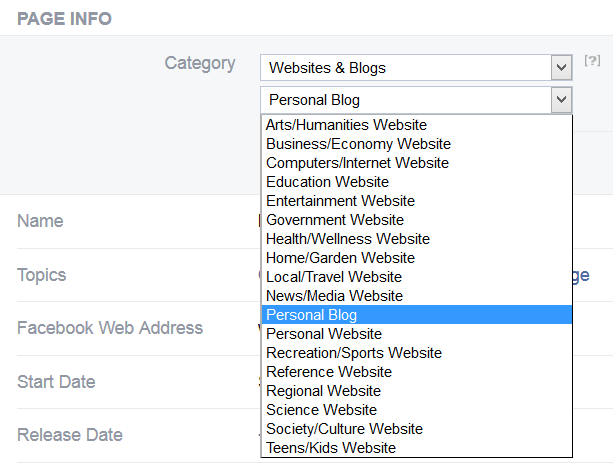
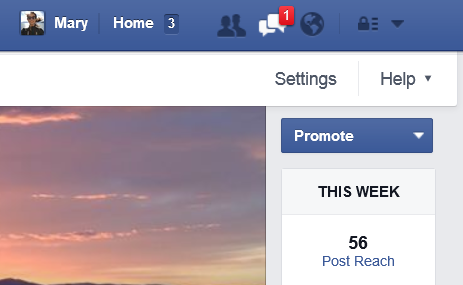 Now here’s what you’ve been waiting for: how to make the page exactly as you want it! Under the cover photo area, click About. This takes you to Page Info where you’ll see the category you chose. Alternatively, at the top right, you’ll see Settings, which takes you to a page full of them. Along the left is a menu with “Page Info” – that brings you to the same place. Hover over the Category section to find the Edit button. From there you’ll see that the category and subcategory choices are far more plentiful than they let on earlier in the process! That’s where I found a previously unmentioned category called “Websites & Blogs,” which contains the subcategory option I had been hunting for: Personal Blog. The nice thing is that you can change this at any time, so as your site/brand evolves, you can update the category accordingly.
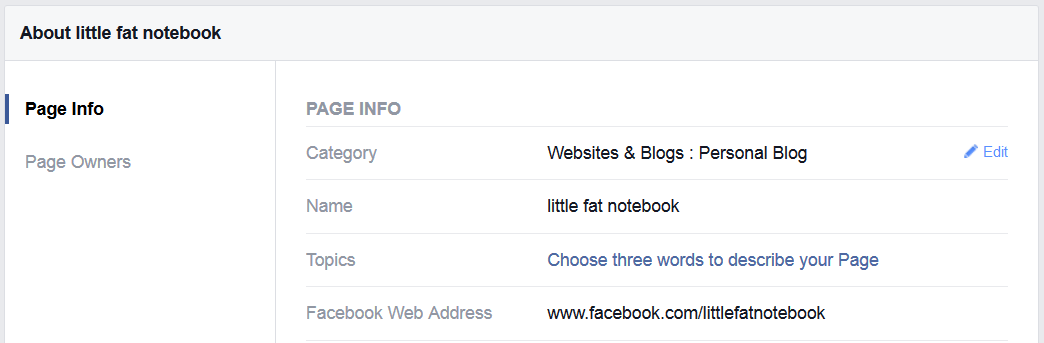
So there you go! I hope that helped. If you found it useful, please like my page to show your support. 🙂
A few other tips:
When you reach 30 fans, Facebook will provide “insights” about your page, which include data about the reach of your page and each post (how many people see it, pretty much), how many people are talking about (sharing) your posts, and how many posts you’re putting up daily. You can also find cool demographic information about your followers. Basically if you’re into data, you’re going to love this part.
Note that I was able to update my page name from Little Fat Notebook to all lowercase. Unfortunately you still can’t add symbols, but as mentioned before, you can use one set of parentheses.
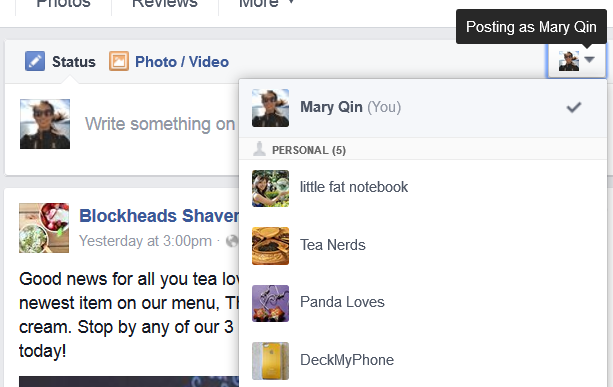
From now on, you can choose to interact with Facebook as yourself (personal profile) or your Page. This option is available for anything public that multiple profiles can access. You won’t see it for posts related to your private friends, for example, since Pages cannot post to personal profiles. But on other pages, you can choose to comment/like as yourself or your Page.
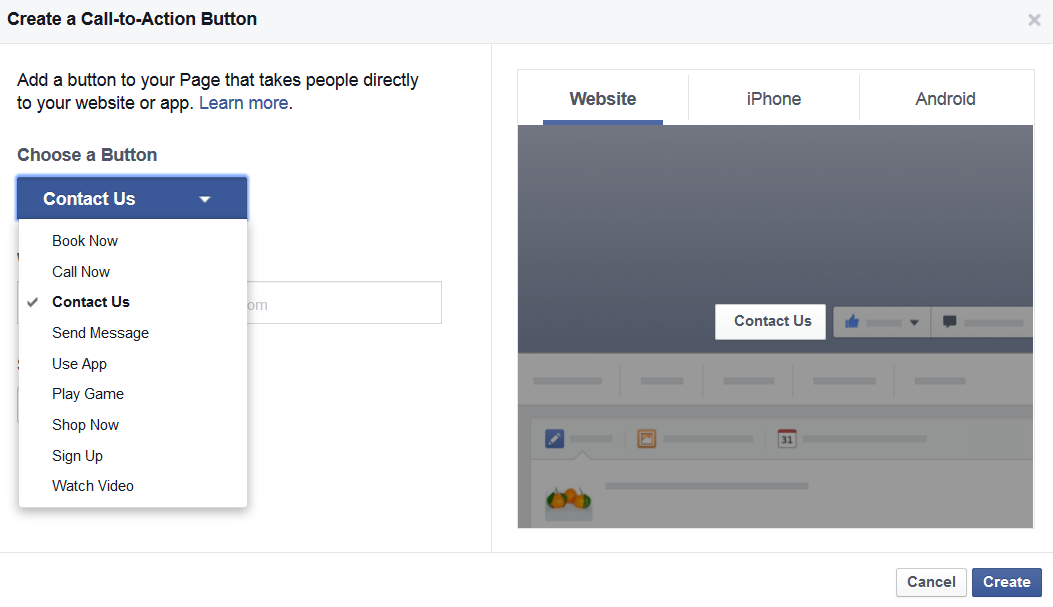
I used to highly recommend putting your website URL in the Short Description so users can easily click to your site from your FB page. Now Facebook has added a Call to Action button instead, so you can set that up to get users to your site. None of the options are particularly blog-friendly though, so I’d like to see a “Read More” or “Read Now” action.
Now that you have a Facebook page, check out my tutorials on:
~how to manage your Facebook page
~how to link your social media accounts
~how to claim your vanity URLs (as mentioned earlier in the post), and more!
You can find all my “how to” posts for useful tips like how to make a favicon and random things like how to set your iPhone/iPad to stop playing music at a certain time or even how to win a Facebook contest!
If you have any questions or tips of your own, I’d love to hear them! Please do share. 🙂


February 12, 2016 8:29 pm
Thank you! This was exactly what I was looking for. Funny how unintuitive facebook can be at times.
March 4, 2016 11:42 am
Thank you so much! Your information was so helpful and I was able to create a page quickly and with ease.
Kate recently posted..Wasting Time
April 9, 2016 10:23 am
Thank you very much, wonderful tutorial!
April 24, 2016 6:38 pm
You’re very welcome! Thanks for letting me know!
April 23, 2016 10:39 am
Thank you SO much for providing this detailed post! I followed each step and was able to create a brand-new page for my personal blog. I appreciate it!
April 24, 2016 6:39 pm
You’re welcome Ri’s Company, great to hear it!
May 17, 2016 8:27 am
Thanks for the tip, was helpful 🙂
Paul recently posted..Reset MySQL root password on Windows
May 19, 2016 3:28 am
Very useful information, thank you.
June 12, 2016 12:23 pm
Thank you so much! This was super helpful.
August 25, 2016 5:47 pm
Hi, Thanks for the advice. I went to your fan page and can’t see how to get to your blog from there. Don’t even see the contact button. Can you tell me what I’m missing?
thanks,
Rebecca
October 2, 2016 5:11 pm
Hi Rebecca, thanks for pointing that out! Facebook as really changed since I last updated the post. I’ve now added a “Learn More” button. 🙂
September 28, 2016 9:53 pm
I followed your instructions and I can still not find the Personal Blog. The categories and subcategories are still as they were before.
Any suggestions?
Shelbi
October 2, 2016 5:05 pm
Hi Shelbi, could you share screenshots of what you’re seeing? Perhaps FB has changed again… if I can see what you see I might be able to help.
November 15, 2016 11:01 am
Thanks for this, it’s exactly what I needed to know. 🙂
November 25, 2016 9:38 pm
Hi – I just started fb and created a page from my profile with the user name link https://www.facebook.com/tuyetvanday.
How come I cant see my page when I type this link to access to it?
Do I have to create a new fan page for my personal blog (also just created)
Thanks
January 5, 2017 8:10 pm
Thank you for this spent about twenty minutes trying to figure this out luckily I found you.:)
Jay recently posted..Board Games That Start With E
January 9, 2017 1:41 pm
Thank you so much, Mary! This information has been an incredible help to me. I am in the process of creating a blog and have been overwhelmed with all the technical stuff that needs to be completed to get everything up and running. I hope to go live in February or March. Your articles about setting up a Facebook page were MOST helpful! THANK YOU! I signed up to follow your blog and can’t wait to see more!
February 14, 2017 10:06 am
Fab. Great help. Thanks 🙂
April 4, 2017 8:34 am
Many thanks, just what I was looking for!
April 20, 2017 5:05 pm
Thanks for the help. How do I keep my blogFB separate from my regular FB? A future blog is going to be sensitive material and I don’t want my grandchildren to be able to read it.
Thanks
August 17, 2017 9:04 pm
Wow thanks this is very helpful to create facebook page.
November 27, 2017 1:46 pm
Thank you! This was so helpful for my website (www.blameitonthebucketlist.com) – I would have expected FB to have a blog section, I also ended up having to put mine under Brand since it was the closest thing that made sense!
Devan Rylee recently posted..Bangkok. #24
December 12, 2017 3:51 am
This was SO useful, thank you so much for your help.
December 14, 2017 5:10 am
Thank-you was very helpful. Now, if I only knew how to post there without using my profile
January 1, 2018 1:12 pm
Thank you! I have a small farm and trying to set up a blogy site has been beyond my capabilities. I have a page but its blah and i didnt know how to work on it!
Jennifer Holdcroft
Itty bitty farm.
January 31, 2018 10:35 pm
OMG This works so perfectly! Great post!